Modifying the Blade CP Pro - the frame
|
 |
Frame modifications
We all crash; we all replace airframe parts. Crash hard enough and you have to migrate every component from the broken main frame to a new one. Two areas of the frame that benefit from modification are the top canopy retainer rod (the lower rod below the receiver isn't needed) and the joint between the tail boom and the frame.
Another thing we all do is remove and replace the canopy each time we fly. The carbon fiber (CF) rod that secures the canopy to the frame is not held tightly in the frame. When you take off the canopy and try to put it back on—to put in a freshly charged flight battery—the rod pops out of the frame and has to be replaced and held carefully while you reattach the canopy. Glue is not the answer because even a glued canopy rod pops out in a crash, forcing you to re-glue it and deal with glue build up on the frame. The easy way to secure the rod permanently is with a 4" zip tie as illustrated below.
 |
Zip ties holds canopy rod without gluing (and gluing ... and gluing....) |
Pull it nice 'n tight. After securing my canopy retainer rod with a zip tie it has not budged despite several crashes. Before this mod the simple act of removing the canopy to change the flight battery would dislodge it.
The Quick Change Tail Boom
Everyone but myself and a few others glues the boom into the frame, then frets about removing the boom when it breaks. After too many of these cycles I realized that zip ties are the way to go. Instead of gluing a new tail boom into the main frame, glue two zip ties passed through the gyro mounting plate to the tail boom:
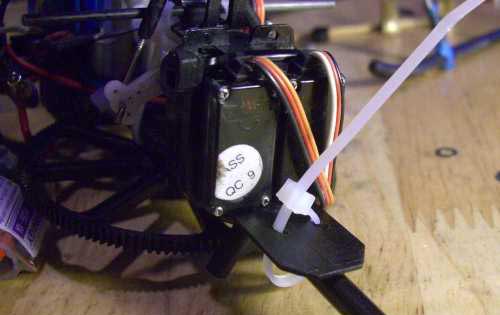 |
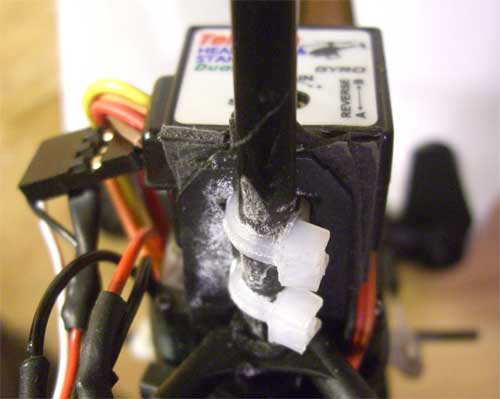
Drill four holes in the gyro mounting plate, two on each side of the tail boom. Thread a zip tie through each pair of holes and close the loops like the one shown above. |
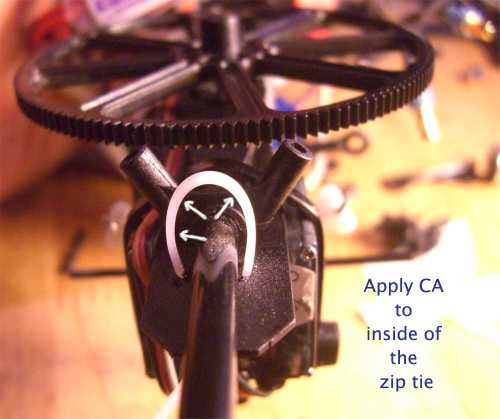 |
Carefully apply cyano-acrylate (CA) glue (AKA 'super glue') where the loop will touch the tail boom. Try to avoid gluing the boom to the gyro mounting plate. |
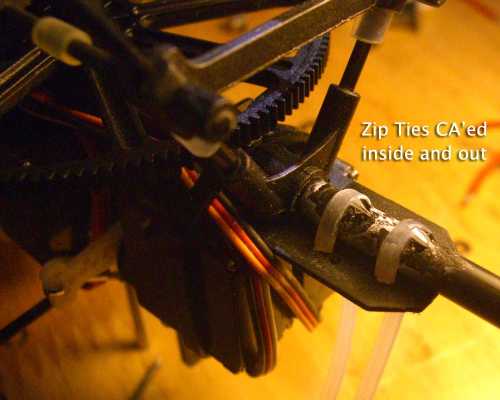 |
After putting glue on the inside of the loose ties, tighten them and put more glue over them and on the boom next to them. Don't get glue on the mounting plate or the frame. |
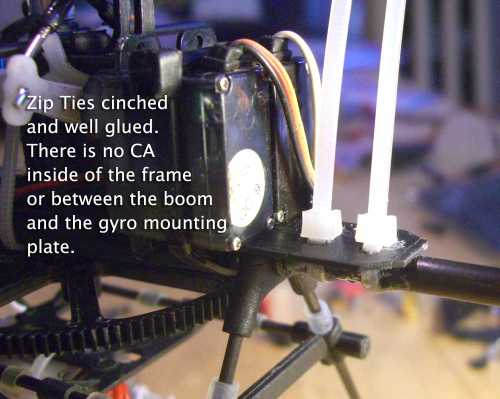 |
Zip ties cinched up tight and glued. |
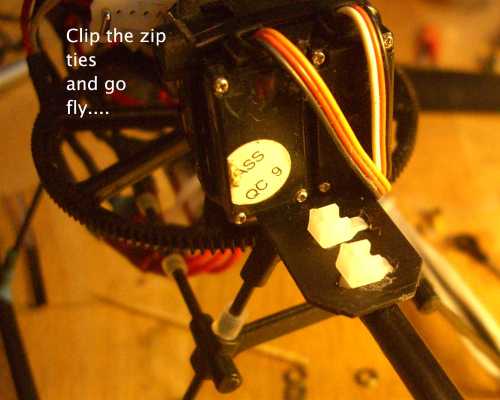 |
If you use a separate gyro put the tie blocks below the gyro mounting plate as shown below. Then you can cover the top of the plate with two layers of double-sided tape. For the first layer run strips between and around the shanks of the zip ties on the other side. The second layer covers everything. This system continues to hold the gyro on my Blade no problem. |
|
Zip ties positioned to allow a separate gyro (Telebee). |
Be sure to let the CA dry completely after covering the zip ties where they contact the tail boom. This will take from three to six hours depending on temperature and humidity. After you glue the zip ties to the tail boom instead of inside the frame you only have to clip the zip ties to remove the boom if it gets broken. This modification turns a difficult and uncertain part replacement into a breeze.
While we're thinking about the tail boom, if we insert it into the tail case dry and just run CA around the outside of that joint the case will be easy to remove when it comes time to take it off. Remove the tail rotor, de-solder the wires to the tail motor, remove the motor; then just dribble a little boiling hot water (with a tablespoon) over the joint and the tail case will pull right off of the tail boom.
Mount the Servos with Zip Ties
A common practice is to wrap the two back servos and the front elevator servo with zip ties to keep the wires in place and make sure the servos don't slip out of place during flight. Well, if you are going to zip tie the servos anyway why bother with double-sided tape? It is a real chore to clean tape residue from the servos and frame to change one or the other. I stopped using the tape and subsequent repairs and re-fits have been that much faster.